
A few months ago, I booked a cruise with 14 other folks and what was bound to be a fun and interesting vacation in the midst of the cold, unpredictable weather that the nation's capital is apt to bring. At the time of booking, I immediately knew that I wanted to make a new one-piece swimsuit to take on the trip. We were to be stopping in Grand Turks, Jamaica and the Bahamas so I was ready to jump at the chance for some beachy blog photos lol. I originally wanted to make a Sophie swimsuit but figured that wouldn't really be feasible seeing as though I lacked MOST of the materials for it. I remembered Vogue 9192 and decided that I would go for it. After going through my scraps and remnant bags, I realized I not only had enough fabric for ONE view of the pattern, but that I could make TWO separate views!
Everything was great until days started passing by so quickly. Then days turned into weeks... and weeks turned into months! Next think I knew, I had one week to make 2 swimsuits AND during the week of Thanksgiving! I had two free nights during the week so I resolved to make one swimsuit on each free night. Talk about dreaming the impossible dream! lol I figured this debacle would work for number 14 on the Sew '16 Challenge. 1 pattern, 2 swimsuits, 2 nights...Let's go!
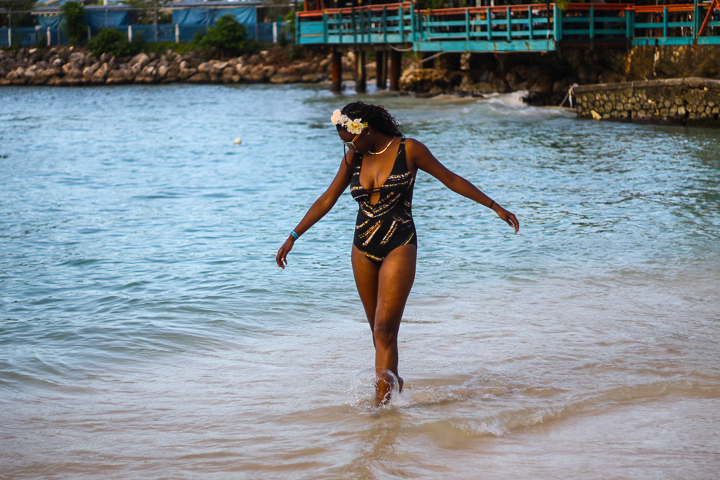
The first suit I made was View B. I used scraps of fabric from my first handmade swimsuit. I got the fabrics from Fabric Mart. The lining was from JoAnn Fabrics. I recycled the same design concept from the first one and used the print for the front and solid back for the back.

This swimsuit was generally easy to put together, especially after watching Heather's Sophie Swimsuit Workshop. This is not a plug necessarily but it's a great workshop and it removed alot of fear for me to work on this suit. She shows a lot of great general techniques that helped quite a bit. One of the ones I used most was for the straps in the back and the small straps in the middle front. I sewed them right sides together and then before turning them right sides out, I basted the elastic to the seam allowance. THEN I turned the tube right side out and the elastic falls perfectly into place inside. What made it easy for me to turn the tubes with the elastic was one of the turners in my Fasturn Tube Turners set! There was a liiiitttllleee bit of a learning curve, but once I got, I got it.So happy that I was able to get them for my birthday. I believe it prevented a lot of frustration!

One of the mistakes I made that put this swimsuit into crunchtime was that I cut the pattern pieces in the wrong direction! I didn't pay attention to the cutting layout or the pattern piece. Luckily, at some point before sewing everything together "cut on crosswise fold" caught my eye! I was like "huh??" and had to go back and check. I had to recut fabric & lining pieces! Thank goodness I had enough! That's some grace for ya because that could have been a tragedy! The other direction definitely had less stretch.

Oh! I cut a size 14 thinking that I would just take in where I needed (because I usually cut straight size 12s) but it turned out that a 14 fit pretty exact. ACTUALLY I need an FBA to give a little more coverage on the sides and a smidge more width and length in the front bodice. It doesn't feel very secure so I'm just going to keep this swimsuit as my "hang around the beach" suit. I wore this suit in Jamaica under my clothes while I was ATV-ing and it was SUPER comfortable. I also cliff-jumped in it (see instagram) and had a wardrobe malfunction hahahaha. Luckily noone saw it outside of the water! But now I know better LOL.
All in all, I can say this is one of my FAVORITE swimsuits that I own!
The second suit I made was View C! Luckily I waited to cut it out until AFTER I was finished with the first, so I paid attention to the cutting layout as well as cut the size 14. This swimsuit proved even more that I need an FBA. It has a shelf bra that doesn't really do anything for me because it doesn't cover my bust all the way. Also, it sits a little low on the side with no strap and the side seams both pull to the front. Definitely noted for next time.

This suit was even easier to put together than the first because I had just gone through adding all of that elastic to the black one, it started feeling like second nature this time around. The fabric is a Kelly Green swim/dance solid from JoAnn Fabrics. The view is lined with the same fabric. The fabric gets darker when it gets wet but it dries really quickly outside of the water. That was convenient as we were getting ready to leave the beach in the Bahamas and go exploring to find food.


I had an EXTREMELY hard time finding a 2" ring for the straps to be sewn onto. So hard, in fact, that I never did. My mom ended up suggesting some different clasp options while we were in JoAnn's and we decided the flower would be a cute closure/embellishment. I almost spray painted it gold but at the last minute I decided to leave it be.

I think it's a really cute swimsuit and I'll probably make it again. If only to get that shelf-bra right. I really want to incorporate some shelf bras into other makes. Having a large/heavy bust should keep me from having my back out!! *gets off soapbox*

Instructions for both views were pretty easy to understand. The only parts I got confused at were around the parts where they were attaching the crotch seams and the lining crotch seams. I didn't think that those instructions would give a clean finish (on either suit) so I did my own thing for both and ended up with what I was expecting.
I think you should absolutely make this pattern. It's awesome and I feel classy and chic in both suits! I'm happy I was able to finish them both with NO time to spare!
What do you think about them? Have you made this pattern yet? If not, do you want to?? Let me know in the comments!
Be back soon!
xoxo, Tasha

No comments:
Post a Comment
Thank you so much for taking the time to comment! :-D
I read each one and I do my best to respond to each of them personally :-)